
As a spray foam contractor, setting proper expectations with your clients is crucial for project success. Understanding the complete installation process, from initial consultation to final cleanup, helps you deliver exceptional results while maintaining professionalism and ensuring client satisfaction. This comprehensive guide walks you through every phase of a spray foam insulation project, ensuring you’re prepared for what lies ahead.
The Pre-Installation Phase: Setting the Foundation
Before any foam is sprayed, thorough preparation determines project success. The pre-installation phase typically begins with a detailed consultation where you assess the property, evaluate substrate conditions, and identify potential challenges. During this stage, you’ll measure moisture content, inspect structural elements, and determine the appropriate foam type—whether open-cell or closed-cell spray polyurethane foam.
Clear communication with property owners about timeline expectations is essential. Most projects require one to two weeks between consultation and installation, allowing time for material procurement, crew scheduling, and coordination with other trades on new construction projects. This planning window ensures your team arrives fully prepared with the correct equipment, materials, and protective gear.
Site preparation involves protecting areas not receiving the foam application. Your crew should establish containment barriers using plastic sheeting, protect HVAC systems, cover electrical fixtures, and ensure adequate ventilation. The workspace must be cleared of furniture, stored materials, and obstructions that could interfere with uniform foam application. Temperature and humidity conditions must fall within manufacturer specifications—typically substrate temperatures between 50-90°F—to ensure proper foam adhesion and expansion.
The Installation Day: What Actually Happens
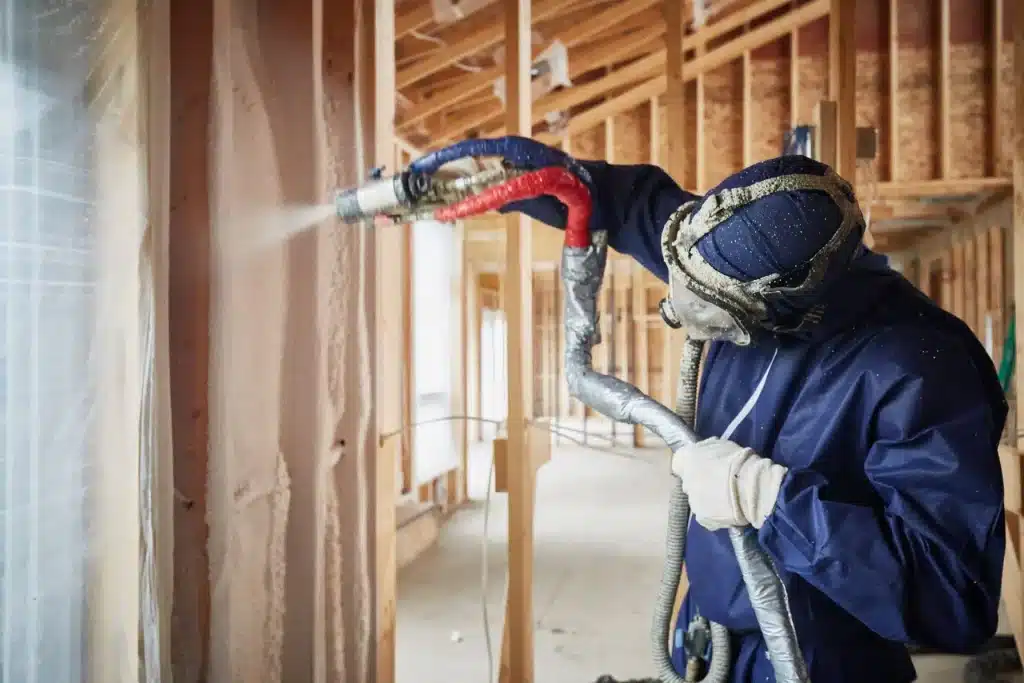
Installation day brings controlled chaos that transforms into insulated excellence. Your crew arrives with specialized equipment, including spray rigs, generators, compressors, and personal protective equipment (PPE). The setup process takes 30-60 minutes as technicians calibrate equipment, verify chemical ratios, and conduct test sprays to ensure optimal foam consistency.
The actual spraying process follows a systematic approach. Experienced applicators work in sections, applying foam in controlled passes to achieve the desired R-value. Open-cell foam typically requires fewer passes than closed-cell, but both demand precision. The foam expands rapidly—sometimes up to 100 times its liquid volume—filling cavities, sealing air gaps, and creating a continuous thermal barrier.
During application, proper ventilation becomes critical. While modern spray foam formulations have improved safety profiles, chemical odors and off-gassing require active air management. Professional crews maintain airflow patterns that protect both workers and building occupants. For residential projects, occupants should plan to vacate for 24-48 hours post-application, allowing complete curing and ventilation.
The installation timeline depends on the project scope. A standard 2,000-2,500 square foot home typically requires one to two days for complete attic-to-basement coverage. Larger commercial projects or those with complex architectural features may extend to multiple days. Weather conditions, substrate preparation quality, and crew experience all influence completion speed.
Quality Control and Curing Process
Once the application completes, the curing process begins immediately. Spray foam undergoes chemical reactions that transform it from liquid to a solid cellular structure. Open-cell foam typically cures within hours, while closed-cell formulations may require 24-48 hours for complete polymerization. During this period, the foam continues expanding slightly, filling micro-gaps and creating that signature airtight seal.
Quality assurance involves visual inspection, thickness verification, and adhesion testing. Professional contractors check for voids, overspray issues, and proper coverage depth. Any deficiencies receive immediate remediation through additional applications or trimming excess foam. Thermal imaging cameras help identify potential gaps in the thermal envelope that might compromise insulation performance.
Post-curing, excess foam gets trimmed flush with framing members, creating clean surfaces for drywall installation. This trimming process requires skill—cutting too deep compromises R-value, while leaving excess foam creates framing irregularities. Professional crews use specialized cutting tools and techniques to achieve consistently smooth finishes.
Cleanup and Post-Installation Procedures
Professional cleanup distinguishes exceptional contractors from mediocre ones. Once foam curing completes, your crew removes all protective coverings, cleans overspray from unintended surfaces, and properly disposes of waste materials. Spray foam waste requires careful handling according to local regulations—cured foam can typically go to standard landfills, while uncured materials may need special disposal.
Equipment decontamination happens off-site, but the workspace should return to pre-project condition. This includes removing foam remnants from floors, cleaning windows and fixtures, and ensuring all tools and materials leave the property. A final walkthrough with the property owner documents completed work and addresses any immediate concerns.
Documentation matters for long-term project success. Provide clients with installation certificates, warranty information, product data sheets, and care instructions. Many jurisdictions require specific documentation for building code compliance and energy efficiency certifications. Professional contractors maintain detailed project records, including photos, material quantities, and installation conditions.
Managing Client Expectations and Communication

Transparent communication throughout the project lifecycle builds trust and prevents misunderstandings. Set realistic timelines during initial consultations, explaining that weather, material availability, and coordination with other trades can impact scheduling. Provide written estimates detailing scope, materials, labor costs, and payment terms.
During installation, maintain regular contact with property owners. Explain daily progress, address emerging concerns, and provide realistic completion estimates. Many contractors use project management software or simple text updates to keep clients informed, reducing anxiety and preventing miscommunication.
Post-installation follow-up demonstrates professionalism and commitment to quality. Schedule a post-project inspection 30-60 days after installation to verify performance, address any concerns, and ensure client satisfaction. This follow-up often generates referrals and repeat business while identifying potential warranty issues early.
Elevate Your Spray Foam Business with Expert Marketing
Successfully managing spray foam insulation projects requires technical expertise, communication skills, and business acumen. As the spray foam industry continues growing, contractors who deliver exceptional results while maintaining professional standards position themselves for long-term success.
Building a thriving spray foam business extends beyond installation excellence; it requires strategic marketing, client relationship management, and industry positioning. Whether you’re establishing your contractor brand, generating qualified leads, or scaling operations, specialized marketing support can accelerate your growth.
Ready to take your spray foam business to the next level?
Contact Spray Foam Genius Marketing for comprehensive marketing solutions tailored specifically for spray foam contractors. Our team understands the unique challenges and opportunities in the insulation industry, delivering strategies that generate leads, build credibility, and drive sustainable growth.
USA: 877-840-FOAM
Canada: 844-741-FOAM
Email: [email protected]
Visit Spray Foam Genius Marketing to discover how we help spray foam contractors dominate their local markets and build profitable, sustainable businesses.
FAQ: Common Questions from Spray Foam Contractors
How Long Should Clients Stay Away After Spray Foam Installation?
Recommend occupants vacate for 24-48 hours following spray foam application. This timeframe allows proper curing, off-gassing dissipation, and adequate ventilation. While modern formulations have reduced odors significantly, this precaution ensures optimal indoor air quality and client comfort. Always follow manufacturer-specific recommendations for re-entry timing.
What Temperature Conditions Are Required for Proper Installation?
Substrate temperatures must typically remain between 50-90°F for optimal foam adhesion and expansion. Cold substrates below 50°F can cause poor adhesion, reduced expansion, and compromised R-values. Hot surfaces above 90°F may cause too-rapid curing or dimensional instability. Use infrared thermometers to verify substrate temperatures before beginning application, and reschedule installations when conditions fall outside acceptable ranges.
How Do You Handle Moisture Issues Before Installation?
Never spray foam over wet substrates. Moisture content should be below 20% for wood framing and below manufacturer specifications for other materials. Use moisture meters to verify conditions, address active leaks before installation, and allow adequate drying time for recently constructed or water-damaged areas. Trapped moisture can cause foam delamination, mold growth, and structural damage.
What Equipment Maintenance Prevents Installation Problems?
Regular equipment maintenance prevents costly delays and quality issues. Clean spray guns daily, inspect hoses for wear, calibrate proportioning equipment weekly, and maintain proper chemical temperatures. Keep backup nozzles and mixing chambers on-site for quick replacements. Equipment failures mid-project create client frustration and compromise installation quality—preventive maintenance protects your reputation.
How Should Contractors Price Spray Foam Projects Competitively?
Price based on board footage (square feet × inches of thickness), project complexity, accessibility, and material costs. Factor in equipment depreciation, labor, insurance, and reasonable profit margins. Don’t compete solely on price—emphasize quality, experience, warranty coverage, and professional service. Provide itemized estimates showing material and labor costs separately, helping clients understand value while preventing scope creep.
Sources:
- EPA Spray Foam Safety Guidelines – Official ventilation guidance to promote safe use of spray polyurethane foam insulation
- Spray Polyurethane Foam Alliance (SPFA) – The leading trade association for the spray foam industry offering professional certification programs and technical resources
- Insulation Contractors Association of America – Industry association providing spray foam contractor resources and networking opportunities

- Best Practices for Spray Foam Insulation Website SEO - February 14, 2026
- Proven Email Marketing Tips for Spray Foam Insulation Contractors - February 14, 2026
- Creating a Content Strategy for Your Spray Foam Business: A Comprehensive Guide - October 29, 2025